
When it comes to Christmas celebrations, we are mostly Christmas Eve people. That’s when we have our big family dinner. That’s when I experiment with the holiday menu. We save the gifts for Christmas morning, after which we enjoy a leisurely Christmas brunch. That meal is almost always the same: monkey bread, a baked egg-and-sausage casserole, and fruit salad.
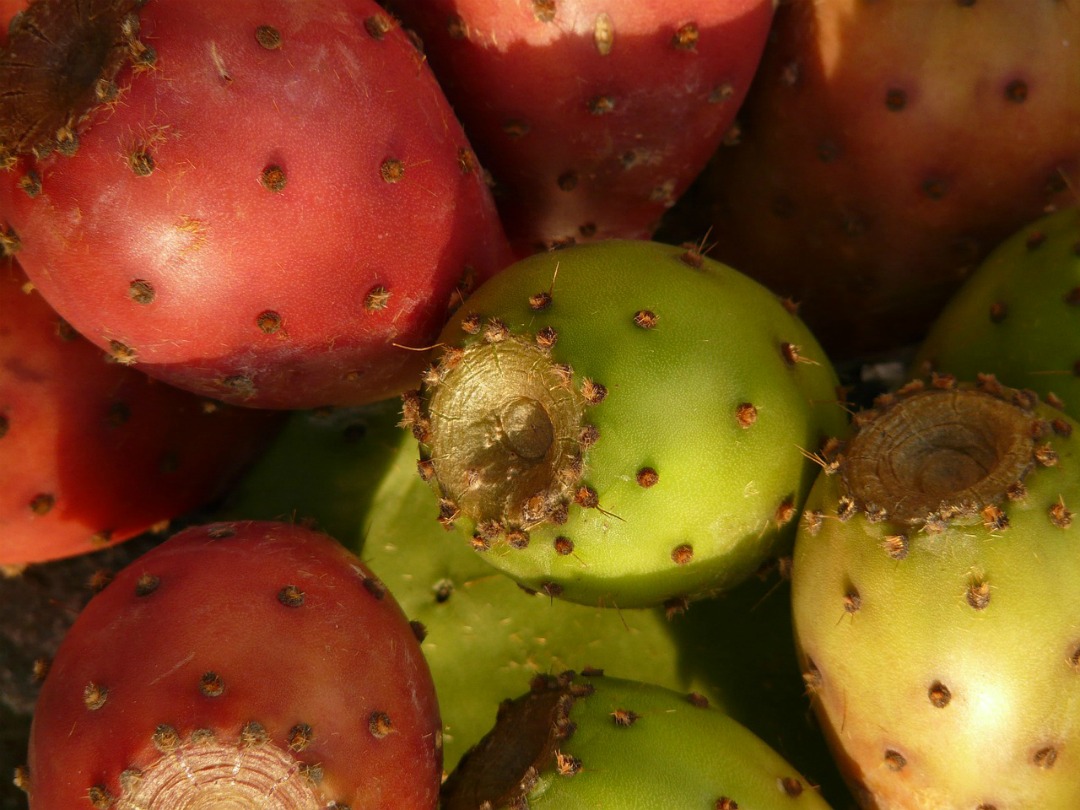
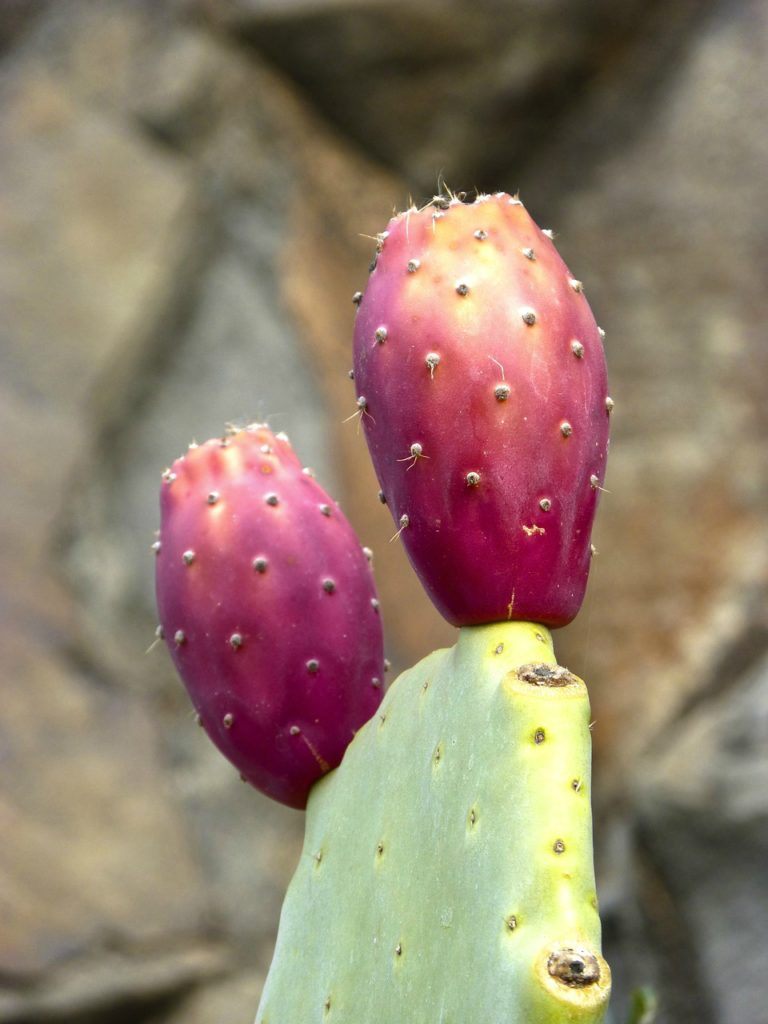
But this year, I decided to make something special for Christmas brunch: a batch of Prickly Pear and Meyer Lemon syrup. We’ll be adding it to our Christmas morning mimosas. If you’ve never seen prickly pears before, you might be taken aback by their appearance. They’re sometimes called tunas, but I find “tuna syrup” to be a profoundly disturbing name, so I’m going to stick with calling them prickly pears.
 Depending on where you live, you might find prickly pears at your local grocery store. I found them 4 for $1 at mine this year. The last time I worked with them, I’d been given a bag full of what had been growing in a colleague’s back yard. (Here in south Texas, prickly pears are everywhere.) That’s when I learned how to deal with the glochids–those little tufty patches that look like they’d be soft as a kitten’s fur. They’re actually more like spikes of fiberglass.
If you buy your prickly pears at the grocery store, chances are someone has already dealt with the glochids for you. If not, you’ll need to burn them off on a grill, or with a kitchen torch. Working with prickly pears from the grocery store was really easy. (I did strain my syrup several times, just to be safe.) I used four large prickly pears for this batch of syrup. They produced almost exactly one cup of juice.
Start by cutting the tough ends off your prickly pears. You can cut them into pieces if you want–that will help them break down more quickly–but I skip this step. Prickly pear juice, while a beautiful magenta color, stains everything it touches. So I just put the whole prickly pears into a saucepan with about a half cup of water. Then I put a lid on the pan and set it over medium heat. The water helps steam the prickly pears and soften them up quickly. Don’t use much, though, because you don’t want to dilute the juice.
After the prickly pears have steamed for ten minutes, take the lid off the pan. Use a potato masher to break them down. (The pulp of this fruit is very strange and lumpy, but don’t worry–you aren’t going to use it.) Keep smashing the fruit with your potato masher, getting as much juice out of it as you can.
Now it’s time for the first straining. Use a fine wire mesh sieve (or a larger mesh sieve lined with a cheesecloth you don’t mind staining an indelible bright pink.) With the back of a spoon, press the fruit pulp to get as much juice as you can. Do the same thing with the prickly pear skins. You may have to strain in batches and remove pulp from the sieve, if the juice can’t drain through.
At this point, use a measuring cup to determine how much juice you’ve collected. Return the juice to the saucepan (after rinsing it out, so you don’t have any chunks of fruit in your syrup) and add an equal amount of sugar. There’s no need to be precise here–I had slightly more than a cup of juice and I used a scant cup of sugar, because I’m always wary of things being too sweet. Set the saucepan over medium heat and stir the mixture with a whisk until the sugar dissolves. Then bring it to a boil and let it bubble away for about five minutes. You’ll be able to tell that it’s ready when the syrup trails from a spoon in a thin line. Take the syrup off the heat.
Prickly pears have no acid whatsoever, so you’ll need to add something tart. I used the juice of one medium-sized Meyer lemon. You could also use citric acid, if you have some on hand from canning, but any citrus juice will do. Add a bit at a time and taste the syrup until you get to the right balance of flavors. I left the Meyer lemon rinds sitting in the hot syrup while it came to room temperature. I didn’t want bits of lemon zest in my syrup, but I thought the lemon oil from the rind would be a tasty addition. (And I was right!) Then I strained the syrup a second time, as I poured it through a funnel placed in the neck of a storage bottle. I’ll store that bottle in the fridge until Christmas Eve.
The finished product looks like this:
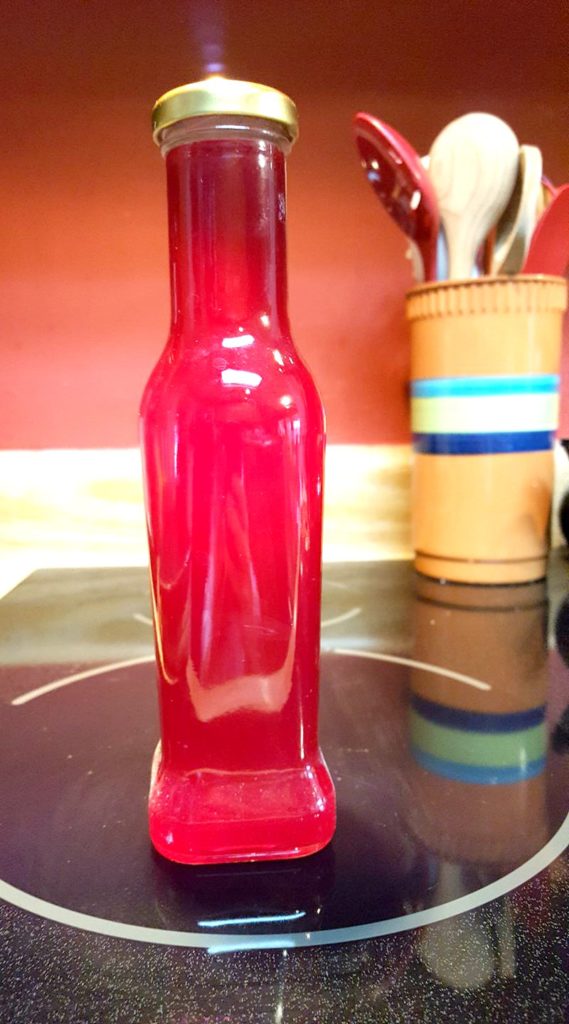
(Pardon the reflection from its heavenly halo.)
This syrup is just so beautiful. It would make a great gift item, if you make a bigger batch, and it’s just as delicious on pancakes or ice cream as it is in drinks. Best of all, it doesn’t take much time, money or effort to surprise your loved ones with a little something special.
5 Comments
I only now of prickly pears from references in literature! What a cool process!
I’ve never had a prickly pear!
Growing up we always had sticky buns for breakfast on Christmas. I always look forward to it, I love the sticky stuff with nuts on the bottom but then I developed food sensitivies and I can’t eat sticky buns any more 🙁 fun memories though
The monkey bread recipe I use produces something very similar to cinnamon rolls. Since I have to eat a gluten-free diet, I don’t eat them anymore–but my kids and husband love them, so I make them anyway!
This is so neat! I’ve never seen a prickly pear! Thank you for sharing this, always fun to learn something new. It looks so lovely too!
If you ever have a chance to try one, go for it! I love prickly pear margaritas. The fruits by themselves aren’t great, since (as I mentioned in my post) they lack any acid–but combined with a splash of lemon or lime juice, they’re delightful.